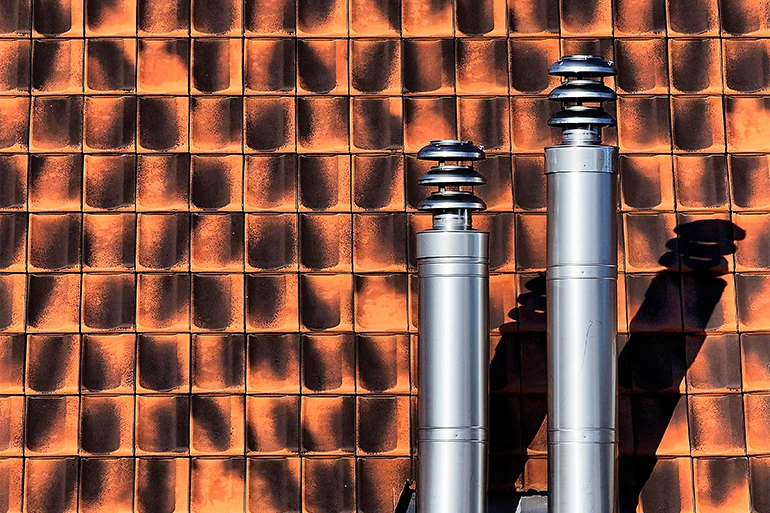
Chimney Caps and Covers Buyer's Guide
What is the point of a chimney cap? Is it even necessary to have one, and if so, which one should you select for your chimney? Will it affect the draft of your fireplace?
If you have questions regarding chimney caps, you've come to the right place. We'll walk you through the purpose of a chimney flue cap, its importance in protecting your home, and the things you should consider when choosing what type of chimney cap to buy.
What is a Chimney Cap?
One of the main functions of a chimney cap is to prevent debris from entering your chimney and blocking airflow from the outside. Not to mention, they also prevent unwanted animals from entering your chimney. Chimney caps are often referred to as a chimney cover because they keep birds, squirrels, and other animals from building a nest inside your chimney.
Your Chimney is not an Animal Hotel
Small animals are attracted to the warmth of your chimney, and without the protection of a chimney cap, they can easily crawl inside, build large nests, have babies, and generally make themselves a real nuisance (not to mention blocking the airflow of your fireplace and creating a fire hazard!)
Draft Issues and Fire Safety
Many customers worry that installing a chimney cap will negatively affect the draft and airflow of their fireplace. In reality, a properly installed chimney cap can actually improve the draft of your chimney and help it function properly.
Chimney caps also help keep stray embers contained within the chimney and prevent them from coming into contact with your roof or nearby foliage that may create a fire hazard.
Things to Consider Before You Buy a Chimney Cap
There are several models of chimney caps, and sorting through the options can be a little overwhelming, so here are some tips on how to narrow your search for the perfect chimney cap.
STEP 1: Examine Your Chimney
First, determine what type of chimney you have, including the shape and size of the chimney. Some common chimney types include the traditional masonry chimney (without a clay flue ), the traditional masonry chimney with a clay-lined flue, and a prefabricated metal pipe chimney.
Researching the style of your chimney is the best place to start, since it will affect what caps should be installed for your situation.
STEP 2: Select Your Chimney Cap Style
CHIMNEY CAPS FOR MASONRY CHIMNEYS
Once you know the construction and dimensions of your chimney, you are ready to choose a style of cap. Here are some of the options available:
Tile Mount / Outside Mount Caps
This style of chimney cap features a top lid (sometimes removable for cleaning), a screen, and a bottom perimeter frame equipped with tightening screws for mounting to the chimney. The frame can either sit on top of the clay flue of a masonry chimney (with the screws tightened against the clay tile) or can be ordered large enough to cover the entire chimney (extending to the outer brick perimeter instead of just the inside flue).
This type of cap is usually cost-effective and easy to install, but since the set screws can only be tightened so far, very high winds can sometimes dislodge it. An additional option is to use construction adhesive with the set screws or " tile grippers" (accessory gripping legs that push down into the chimney and grip against the tile).
Push-In Tile-Mount Chimney Caps
Designed for quick and easy installation with clay fireplace flues, this type of flue cap relies on a set of gripper legs that push down into the chimney flue, holding against the tile and keeping the chimney cap in place. This is by far the easiest cap to install and remove for service, but it is easily dislodged in high winds. As such, it should only be used in low wind areas.
Surface-Mount Chimney Caps
A more expensive option than tile mount caps, surface-mount models are an appealing option due to their durability and protection level. Designed with a removable top lid, a perimeter screen, and a set of base plates, they are made to attach directly to the chimney wash (the masonry covering on the top of the chimney around the flue). The base plates have a series of perforations drilled for their entire length, allowing you to line up the plates, mark holes to drill into the chimney wash, and then attach the base plates with masonry anchor screws. The base plates on many chimney caps are hinged, allowing you to accommodate for sloped chimney surfaces.
This cap style offers flexibility on size since you can choose to order a cap just big enough to cover the chimney tile or select a larger one that will cover the entire chimney top. More coverage will help the chimney wash to last longer and will offer greater protection against wind-driven rain or snow, but it is more expensive than the narrow coverage models.
Band-Around Chimney Caps
Although not as common as the other styles, this cap is designed to band around the outer perimeter of the entire chimney. It differs from tile mount/outside mount caps by using much larger bands that lock together and adjust as needed. It can only be used for outside perimeter mounting.
CHIMNEY CAPS FOR PREFABRICATED METAL CHIMNEYS
Made specifically for prefabricated chimney pipes, this style of chimney cap has a spring-wound base (a metal coil that narrows when squeezed and then springs back into shape). When installing the cap, simply squeeze the spring to compress it and push it down the chimney pipe. When released, the metal springs out and wedges itself into the chimney pipe, holding the cap in place. We recommend you also run self-tapping screws through the outer wall of the pipe and into the cap after installation.
These caps come in two styles: solid pack and air-insulated. Solid pack push-in chimney caps are designed for use with solid insulated chimneys like DuraTech or SuperPro. These do not allow for air to enter the chimney. Air-insulated push-in chimney caps are designed to work with most chimney systems associated with factory-built open fireplaces. The cap has an internal baffle that allows air to enter between the inner and outer walls of the chimney.
SPECIALTY CHIMNEY CAPS
Liner Caps
Liner chimney caps are similar to a push-in chimney caps, but instead, they feature an outer clamp that is designed to be tightened to a chimney liner installed into a masonry chimney. This type of chimney cap is usually only available in stainless steel.
Flue Cap Stretcher
This style of a chimney cap is designed to extend the length of a masonry chimney that is too short to draw properly. Insufficient height can cause issues with proper chimney draw, so a low-cost solution is to use a flue cap stretcher to lengthen it. The cap is basically a tall tile mount cap, but instead of a mesh screen for the entire height, a solid material is used for the first one or two feet before opening to a mesh screen. These chimney caps are not recommended for high wind areas, as their large size makes them susceptible to blowing off or buckling under a high wind.
Anti-Wind Chimney Caps
As the name implies, this chimney cap is designed to help alleviate wind-related issues. Usually attached with specialized adapters that allow for installation to a chimney pipe or masonry flue, the cap consists of a series of overlapping baffles that prevent wind from directly entering the chimney flue. It also usually has screen mesh installed between the baffles to allow it to function as a debris guard like any other chimney cap.
Custom Chimney Caps
Looking for something to fit a unique configuration? Contact us to get a special quote on a custom chimney cap in whatever size you want!
We can order custom caps through Copperfield Chimney and they produce them under the Gelco brand. Although a custom chimney cap or chimney cover can be more expensive, the size options are far longer, wider, and taller than anything else on our site and are perfect for installations that need a non-standard size. The quote turnaround is very fast and production is usually 5-7 days for most orders.
STEP 3: Choose a Trusted Brand
INDUSTRY'S FINEST
Speaking of brands and suppliers, here's a roundup of some of the top brands for chimney caps:
- HomeSaver - A well known manufacturer of chimney re-lining components, chimney caps, and insulation products, this company offers high-quality stainless and galvanized caps in many styles.
- Gelco - A sister company of HomeSaver, Gelco offers a broader range of material options, styles, and most importantly, full customization of chimney caps through authorized retailers like eFireplaceStore.
- Hy-C - Based in St. Louis, MO, this manufacturer of cost effective chimney caps has been in business since 1947 and offers a multitude of sizing options for most applications.
- ICP/Vacu-Stack - A well known name in the chimney cap industry, this manufacturer focuses on production of high quality wind-defeating chimney caps and adapters.
STEP 4: Determine the Best Material
CHIMNEY CAP MATERIALS
Should you order steel, aluminum, or copper chimney cap? Here's a comparison of the different materials used for building chimney caps so that you can choose the best option for your priorities and budget.
Galvanized Steel: Galvanized steel is a chemically or electrically treated metal that is designed to resist corrosion. There are two options in this category, painted and unpainted. Bare (unpainted) galvanized steel is generally the least expensive, but it only lasts a few years with average use. Painted galvanized steel has a weather and temperature resistant coating that extends the lifespan to 20 years under normal conditions.
Keep in mind that both types of galvanized steel are recommended for areas that are at least 20 miles away from bodies of saltwater. A high concentration of salt in the atmosphere will drastically shorten the lifespan of galvanized steel chimney caps.
Aluminum: Although not very common due to its low heat tolerance, Aluminum is very corrosion resistant and even holds up well in areas that have a higher concentration of salt in the air. Aluminum is an ideal choice for keeping debris and small animals out of chimneys that are no longer in use since the low heat tolerance would not be an issue.
Stainless Steel: Stainless steel is extremely corrosion resistant and is one of the most durable chimney cap varieties. Stainless steel chimney caps usually come in one of three grades (430, 304, and 316) which indicate their levels of corrosion resistance.
The least resistant to corrosion is 430 stainless, but although it is considered a "decorative grade" of stainless steel, it still offers significantly better corrosion resistance than carbon steel and can last for many decades. It is not ideal for seaside locations.
The next level is 304 stainless. It has more resistance to corrosion than 430 grade because it includes resistance to acid and chemical staining. The added resistance to acid and chemicals makes it ideal for city or industrial areas. It is also the lowest grade acceptable for sea air installations.
The final grade, 316, guards against acid and chemical corrosion to an even higher temperature than 304 stainless. While 304 loses its ability to guard against degradation by acids at about 300 degrees, 316 stainless can remain unaffected up to 500 degrees, making it ideal for flue applications that will see very high temperatures. Used properly, both 304 and 316 stainless caps can easily last for 40 years.
Copper: Like stainless steel, copper is very corrosion resistant. In addition, it dissipates heat quickly and is not prone to thermal warping or damage. Copper chimney caps will start out with a bright metallic color, but eventually patina to a very dark bronze/red color, and finally to a medium green patina. This layer of patina hardens and becomes a very durable shield against further corrosion, making copper caps the longest-lasting chimney cap material.
Copper is the most expensive type of cap, but it is so corrosion resistant that it is unlikely a properly installed copper cap will ever need to be replaced (barring damage from unforeseen weather events).
STEP 5: Choose the Appropriate Size Chimney Cap
GUIDELINES FOR CHOOSING YOUR MESH SIZE, HEIGHT, AND LID COVERAGE
Mesh Size: Most chimney caps come with the option of 3/4 - inch or ? - inch screen mesh. While 3/4 - inch mesh offers less resistance to flow, it allows less protection against sparks escaping the flue. The tighter ? - inch mesh, commonly called "California mesh", offers better spark protection and is required for use in some states (especially in California). The 3/4 - inch mesh is best for cold climates where ice can build up on the screen, while ? - inch is better for dry climates or chimneys with overhanging trees.
Mesh Height: To maintain proper flow, it is necessary to have five inches of clearance between the end of the chimney flue and the underside of the chimney lid. While prefabricated push-in chimney caps already have a built-in clearance, it is necessary to consider clearance when purchasing a surface mount chimney cap. Make sure you order a screen that is tall enough to maintain the 5-inch clearance requirement.
Lid Coverage: Ideally, the chimney cap should have a lid large enough to offer 2 1/2 inches of coverage around all sides of the chimney opening. Again, purpose-built chimney caps will have this built-in, but when ordering tile mount or surface mount chimney caps, keep this measurement in mind. It is recommended to have four inches of coverage for caps used in areas that frequently see severe weather with wind-driven rain.
STEP 6: Chimney Cap Installation
HOW TO INSTALL A CHIMNEY CAP ON A MASONRY CHIMNEY
When it comes to chimney cap installation, every install differs based on the type of chimney cap you have and the type of application upon which it is installed. Chimney caps vary in sizes and styles, and some come with varying components.
In the next section, we'll provide information on how to install a chimney cap for different applications you may encounter. We'll also explore some basic troubleshooting methods used for sealing and repairing a chimney cap.
Surface-Mount Chimney Cap with Fasteners
Most chimney cap installations for a masonry application require a surface mount chimney cap with fasteners or with adhesive. Surface mount chimney caps with fasteners are a type of cap that must be installed to the top surface of the masonry chimney, commonly called the chimney wash. This surface is typically a cement or mortar material that is applied to the brick or stone surface, sloping downwards toward the edge of the chimney edges to help shed water and prevent retention of ice or snow that can crack and damage the chimney.
This type of chimney cap is provided with mounting tabs that are on all perimeter edges of the cap at the base of the mesh screen. Some models have tabs that are fixed, while others are mounted via hinges that allow the tabs to be swung inward or outward, depending on sizing needs.
It is ideal to purchase a cap that offers maximum coverage of the chimney, with the mesh walls set back approximately two inches from the edge of the chimney. The point of this is to keep as much water as possible from collecting on the chimney surface, increasing the longevity of the mortar or cement chimney wash.
Before mounting a surface mount chimney cap, it is highly recommended to repair a damaged or cracked chimney wash by applying a new layer of mortar over small cracks. If the chimney wash is deeply cracked, consider removing the layer and applying a new one.
There are various shaping tools and products to facilitate the installation of a new chimney wash. With the wash inspected and/or repaired, place the cap on the surface of the chimney and measure it to ensure it is set back evenly on all sides. We highly recommend removing the lid of the cap for ease of installation.
Using a construction marker, mark mounting points on the installation tabs every 10 to 12 inches. If you live in a high wind area, we recommend positioning the fasteners closer at every 8 inches. With the mounting locations marked, use a hammer drill to drill holes in the chimney wash at the proper locations.
The manufacturer may provide anchors and screws for attachment, but masonry screws such as the Tapcon brand work well. They will also specify the size of the bit that is needed for drilling the mounting holes. With the holes drilled, the mounting anchors and/or screws can be installed. The lid of the cap can then be installed if it was removed.
Surface Mount Chimney Cap with Adhesive
Surface mount chimney caps with adhesive offer a secondary option to the above mounting procedure. In place of fasteners, these chimney caps use strong bonding adhesive. You would apply all of the same steps mentioned for the chimney caps with fasteners up to the point of marking the location of the chimney cap. Instead of marking the mounting holes through the mounting strips, you will trace the perimeter of the cap. From there, set the chimney cap aside to apply the construction adhesive below the position where the mounting strips will sit.
You will then place the cap over the adhesive. We highly recommend to weigh the chimney cap down with a couple of bricks to ensure maximum adhesion. Be advised that this is a secondary option, but using fasteners is the most ideal application, as adhesive can be difficult to completely thin and separate. As such, this could make it difficult for you to remove and replace the chimney cap later on if needed.
Flue tile mount chimneys are virtually all-brick chimneys constructed over the last 50 years. These typically utilize a terra cotta (high-temperature clay) flue liner. These are individual sections of chimney liner that are adhered to during the construction of the chimney. The last tile should protrude above the chimney wash by several inches, although it is common for the tile above the wash to deteriorate on an older chimney, making a surface mount chimney cap necessary.
For chimneys with a clay liner in good condition, a flue tile mount cap can be used. The advantage of this cap is easy installation and lower cost, although they are not as wind resistant as a surface mount chimney cap and do not offer as much coverage. Tile mount caps must be sized to the outer dimensions of the clay flue tile.
They use a perimeter mounting flange with adjustable set screws that push against the walls of the clay tile, offering enough tension to hold the chimney cap in position. Due to various lengths of fasteners, there is usually a one to a two-inch range of sizing adjustment. These caps install easily, only requiring the cap to sit directly on the surface of the clay tile and then adjust the set screws until they make contact with the sides of the clay tile.
As you tighten, pay attention to the spacing between the cap flanges and the clay tile. It is ideal to keep the chimney cap as centered as possible, with equal spacing on all sides. This ensures the cap is more secure by shortening the space between the flange and flue tile, preventing deflection in the mounting fasteners. In addition to the fasteners, it is also possible to use construction adhesive, but as with surface mount caps, we do not recommend this unless you are in a high wind area.
A secondary and less common type of flue tile chimney cap is a "push-in" type, which has smooth screen sides that end with spring-loaded gripper legs that provide friction. This friction allows the cap to be pushed into the inside of the flue tile. These chimney caps are by far the easiest to install, requiring only that you push the cap into the flue tile until the bottom of the mesh screen rests flush with the surface. However, because they are only friction fit, they can easily be blown loose in high winds.
HOW TO INSTALL A CHIMNEY CAP ON A PREFABRICATED CHIMNEY
Most prefabricated chimney caps are brand-specific, factory-designed to either twist-lock into place or constructed as "drop-ins" that require fasteners. For a twist-lock chimney cap, the bottom of the cap will feature the same type of lance system that the chimney pipe itself used, allowing the cap to simply twist and lock into position. Once fully locked, two to three self-tapping sheet metal screws can be installed around the base of the perimeter to ensure the chimney cap does not loosen over time.
The drop-in chimney caps typically feature a collar, usually 8 to 12 inches in length, which pushes into the inner vent pipe of the factory-built chimney. Some caps will feature a spring-loaded collar that requires pressure to be applied when installing. When released, the collar springs out, providing friction to the wall of the chimney and holding the chimney cap in place. Other styles have brackets that straddle the outer wall of the chimney, allowing fasteners to be installed through the brackets once the cap is in place.
Some companies like Vacu-Stack offer universal chimney caps, with individual lines made for solid-pack or air-cooled chimneys. It is important to select the proper type so that the chimney can perform as designed. These types of caps will rely on push-in collars only and will sometimes feature brackets that can be screwed between the bottom of the chimney cap lid and the sides of the outer pipe, holding them into position. When possible, we always recommend sourcing the original brand and line of chimney cap, but if this is no longer available, a universal chimney cap can be used to keep the chimney in service.
How to Seal a Chimney Cap
While sealing a chimney cap is not typically needed due to the structural design of them, mounting screws or anchors that penetrate the chimney wash on a masonry chimney may serve as an unwelcomed avenue for water intrusion. To prevent long-lasting damage, we recommend you seal all exposed screw heads at the chimney wash with a high-quality polyurethane-based flashing sealant.
As stated before, chimney caps are designed to be watertight, meaning that they are engineered to have fasteners that do not allow water to drip into the venting system. As such, there is not a requirement to seal the fasteners on the lid of the chimney cap; however, the same cannot be said for the mounting fasteners.
If water manages to intrude the fasteners, over time the water can freeze and crack the cement or mortar surface of the wash. To ensure a proper seal for preventative care, you can purchase all the materials you'll need from your local home improvement store in the roofing section. A poly sealant will not shrink or pull away and has an exceptionally long life span. Apply a small dab of sealant to each screw head around the perimeter of the mounting strips. This should get the job done!
How to Replace a Chimney Cap
To replace a chimney cap, you'd simply need to reverse engineer the installation process. The challenge lies in the removal of corroded fasteners and/or adhesives used during the initial installation. Seized fasteners will often round off or snap when attempting to remove them, and old adhesive can be difficult to remove as well.
When it comes to old fasteners, by far the best method for removal is the use of a 4-inch angle grinder equipped with an abrasive wheel. This type of grinder is compact and light enough to use above the ground, while still removing rusty screw heads effectively. Wearing eye protection, use the tool to grind down any rusty screw heads, freeing that portion of the chimney cap. You should always attempt to remove a fastener before incorporating the use of the grinder.
If the old cap adhered previously during installation, you will need to use a thinning agent to break down the adhesive and free the cap. Depending on the adhesive that was used, products like Goo Gone may be strong enough to dissolve the adhesive and free the cap. Some stronger construction adhesives will require you to heat the adhesive with a torch or heat gun, then work a putty knife into the gap and slowly but surely pry the cap away.
Once the old cap has been removed, evaluate the condition of the surface. It may be necessary to clean the surface with mineral spirits and/or resurface the chimney wash before installing the new cap.
How to Repair a Chimney Cap
In almost all cases, the time, effort, and money put into repairing an existing chimney cap will be counterproductive and less cost-effective. In such cases, a new cap will be a better and simpler solution. However, very large chimney caps that are difficult and/or expensive to completely replace can be repaired if necessary.
Repairing a Punctured Lid
It is not uncommon for a chimney cap lid to be damaged by a falling tree branch or for corrosion to eat away at galvanized lids, leading to an eventual perforation. In order to repair the lid, you will need to obtain a pair of sheet metal shears, self-tapping screws, polyurethane flashing adhesive, and a sheet of metal for patching.
- Remove the damaged lid and work at ground level.
- Evaluate the damage and cut away as much of the fragmented metal as possible. The sheet metal patch material should be of a similar gauge to the lid.
- Cut a section of patch material that is at least one inch larger in all directions that the damaged area. Before attaching the patch, apply a bead of the poly sealant to all edges of the patch panel.
- Stick the patch panel in position, then use sheet metal screws to hold it into position.
Repairing a Rusted or Damaged Screen
If the screen itself is damaged, it is possible to cut a length of replacement screen to the same length as the overall circumference of the existing screen.
- Use galvanized or stainless steel expanded metal mesh that is the same size as the existing mesh.
- Cut the screen to the same height as the existing screen, then wrap it completely around the perimeter of the existing mesh.
- Use stainless wire to tie the cut ends together, holding the screen into position.
Shipping and Delivery
Most chimney caps are relatively small and lightweight and will be shipped through the normal parcel service. However, if your chimney cap is over 100 pounds or larger than 42 inches, you can expect the chimney cap to ship via a LTL freight carrier.
Always inspect your chimney cap as soon as it arrives to check for any damage so that you can make any necessary warranty claims as soon as possible.
Summary
Chimney caps are an essential part of protecting your home. Hopefully, this comprehensive article has provided you with thorough knowledge that can assist you with step-by-step instructions to purchase, install, and if needed, seal or repair a chimney cap for your chimney. Thankfully, there are lots of options to fit your weather conditions, chimney type, and budget. Our chimney calculator at the top of this page is a quick and easy way to sort through the various options. If you have any questions about what kind of chimney cap you should order, feel free to contact us— our technicians would be happy to help!