Home Guides and Articles
Fireplace Paint & Stove Paint Buyer's Guide

Fireplace Paint & Stove Paint Buyer's Guide

Want to know a cheap way to make your fireplace or wood stove look brand new? Paint it! Over time, even high-quality fireplaces can start looking dull and the finish can rust or chip. Special high-temperature paint is a great way to make it look young again. (It also adds a layer of protection against rust and wear.)

Fireplace Paint & Stove Paint
Rusted wood burning stove

It's a simple, inexpensive DIY project and you can even paint the fireplace tools to match. Paint is a better option than fireplace polish because the polish rubs off and only gives temporary protection to the finish. Paint, on the other hand, adds a brand new finish in any color you want.

With so many color options, you can often find one that matches your existing paint so you can touch up any scratches without repainting the whole appliance. You can also use it to paint a vent pipe or other chimneypieces.

Hopefully, it goes without saying that you must only use fireplace-rated paint. Otherwise, you'll have a major hazard on your hands. In any case, here's the rundown on fireplace paint including the different types and how to apply it.

What is Fireplace Paint?

Fireplace Paint & Stove Paint
Stove Bright high-temperature paint in assorted colors

Fireplace paint (aka high-temperature paint, wood stove paint, heat resistant paint) can withstand temperatures ranging from 600 °F to 2000 °F. Which is, to put it mildly, very hot. The point of making it so heat-resistant is to allow you to use it on fire appliances without worrying about safety hazards.

In addition to fireplace surrounds and inserts, you can also use the paint inside the fireplace. Other applications include fireplace screens, wood stoves, boilers, and steam pipes.

Note that the paint is not for use on kitchen stoves, stove burner grates, or steam radiators. Also, don't use the paint on cooking grates that come in direct contact with food. We also don't recommend paint if your wood stove has a vitreous enamel finish (a smooth, glass-like finish) since the paint will not adhere well.

Types of Fireplace Paint

Fireplace Paint & Stove Paint
Rutland brush-on high-temperature paint

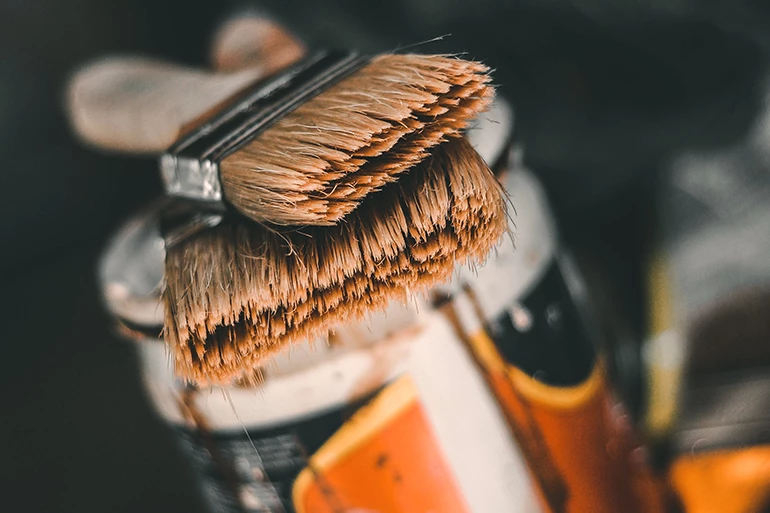
There are two main types of fireplace paint. The first comes in aerosol cans as spray-on paint. This is the most common type. The second is a brush-on paint that comes in a gallon or pint paint can. The difference is mainly in how they are applied.

Now, a confession: Many people adore spray paint. It's fast and also incredibly satisfying to see the paint fill in intricate crevices with a uniform layer.

But everyone who has used spray paint knows it's easy to get unsightly drips if you hold the nozzle too close to what you are spraying. You also have to make sure that you apply the paint in a well-ventilated area and protect other surfaces from any overspray. There's also less coverage per can compared to the brush-on variety.

Fireplace Paint & Stove Paint
Aerosol paint splatter

On the positive side, the spray-on paint is excellent for appliances with elaborate designs or deep seams that would be hard to reach with a brush. You may need to apply more than one coat, but the coats cure more quickly than the brush-on paint.

Brush-on gallon or pint stove paint has a thicker consistency and typically requires 1-2 coats. The cans come with more paint, so you'll likely have enough for more than one restoration project. The thick paint works especially well for old appliances made with porous materials like cast iron. Be extra careful to apply it evenly, since it can be harder to get a uniform coat with a brush or roller.

Also, keep in mind that the brush-on paint takes longer to cure so it will take longer between coats.

Fireplace Paint & Stove Paint
Paint samples color chart

Now let's talk about colors. In general, spray paint offers more variety in terms of finishes and colors. There's nothing wrong with classic black, but if you really want to branch out, try vibrant colors like rosebud metallic, sky blue, or emerald green. There are also several more neutral options to give you plenty of choices when it comes to matching your decor.  The name of the paint often gives a description of the finish. Metallic colors have a more of a sparkle, while regular colors or "flat" finish paint is not as reflective.

Leading Brands

Are you ready to start searching for the perfect color? Stick with quality products that you know will hold up to the high temperatures and stay looking great for years. Here are some top brand recommendations to get you started.

  • Stove Bright: The original Stove Bright aerosol paint was developed for production line workers to cover the occasional scratch flawlessly. It has since become an industry leader for high-temperature paint in both aerosol and brush-on varieties. They come in a wide range of colors so you can match the existing paint or start over with something new.
  • AW Perkins: AW Perkins Co is a leading supplier for chimney cleaning equipment and offers a wide range of products for both professionals and DIYers. Their 1200°F stove and grill paint offer protection in a rainbow of colors.
  • Rust-Oleum: Started by a sea captain who noticed that oil stopped rust from eating away at his ship, Rust-Oleum has been in business since 1921. Their specialty high heat spray paint is also rated to withstand up to 1200°F.
  • Rutland: Rutland has been making stove and fireplace products for over 130 years. Based in North Carolina, they manufacture in Illinois and supply both professionals and homeowners. They offer quality brush-on and aerosol high-temperature stove paint.

How To Apply Stove Paint

There are three phases of a proper application. The first is preparing and cleaning the surface of the fireplace or stove you intend to paint. This could take anywhere from 2-4 hours depending on the condition of the stove. The second phase is the actual application, and the third phase involves the curing process.


Preparation

Prepping the surface for the new paint is crucial for getting a nice new finish. Start by deciding whether you need to remove the existing paint coat or whether you can paint over it. If the old paint is badly chipped or rusted away, you may be better off removing it.

(Safety first! Work in a well-ventilated area and use eye protection and any other safety equipment that the tools you use require.)

Before you begin, test a small patch of the new paint on top of the old paint. Wait for it to dry and inspect it for any bubbling or evidence of a chemical reaction. Although rare, some old stove or fireplace paint can react with the new paint and create an unsightly mess. If your paint reacts in this way, you'll need to remove it completely before you begin.

Follow all of the instructions and recommendations for the paint that you choose. For example, solvent (trisodium phosphate) or paint thinner can be helpful in cleaning away soot and oily grime, but some paints are incompatible with solvent. Always use products that you know will work together.

If you're removing the paint completely, you may want to use a steel wool drill attachment and a power drill. This speeds up the paint removal. Other options include a sandblaster or a sander/grinder.

If the old paint is not in terrible condition and does not chemically react with the new paint, it is not necessary to completely remove the old paint. Instead, scuff the surface with fine-grit sandpaper or steel wool pad. The goal is to make a rougher surface so the new paint will adhere easily.

Wipe off all the paint dust with a white cloth so the surface is both scuffed and clean. (You can use paint prep to help clean off the dust you make when sanding.)

Tape off the glass and any other parts you don't want to paint. You can also use cardboard, newspaper, or drop cloth to protect the surrounding areas from any drips or overspray.


Applying the Paint

Once you have the stove completely clean and prepped, you are ready to start painting. Read the instructions on your paint can from start to finish. Some paint may also require a primer to help with the adhesion. Here's a step-by-step overview once you're ready for the main layer of paint:

Spray Paint

  • Shake the can vigorously to stir the paint. You should hear the marble rattle inside.
  • Test the paint by spraying on a scrap piece of cardboard to make sure the spray is even.
  • Keep the can at least 12 inches away from the surface while spraying.
  • Start near the top and work your way down.
  • Follow the directions for how long to wait between coats and add additional coats if necessary.
  • Cure the paint.

Do

  • Paint in a well-ventilated area.
  • Follow all the manufacturer's instructions.
  • Wait for the recommended length of time between coats.
  • Wear gloves to keep the paint off your hands.

Don't

  • Don't apply the layers too thickly.
  • Don't hold the nozzle in one place for too long (this could create pooling or drips).
  • Don't paint when it's too hot or too cold (the paint should list an ideal temperature range).

Brush-On Paint

  • Open and gently stir the can until it is uniformly mixed.
  • Using a clean brush or roller, start at the top and begin to paint. 
  • Work your way down and around the appliance, being careful to paint evenly. 
  • Follow the instructions for how long to wait in between coats. 
  • Apply an additional coat if necessary. 
  • Cure the paint.

Follow the dos and don'ts above for the best results. Note that it is also possible to use a paint sprayer to apply the brush-on paint.

Curing

Curing the paint makes sure that the heat-resistant properties of the paint are activated. The paint you order should come with specific instructions for curing, but these are some general guidelines. Make sure the area is well-ventilated before you begin curing. We recommend that you have everyone leave the area during the process so that no one breathes the fumes.

  • Wear a face mask in order to minimize inhalation.
  • Fire the appliance up to approximately 100 °F - 250 °F (according to the manufacturer guidelines) for 15-20 minutes.
  • Gradually increase the temperature of the fire over the course of 45 minutes to one hour to a temperature of around 500 °F.
  • Expect to smell an odor from the paint as it dries. You will see smoke coming off of the pipe, this is normal as the paint sets.

Storage and Disposal of Wood Stove Paint

Fireplace Paint & Stove Paint
Recycling aerosol paint cans

After you finish painting your fireplace or stove, you might be wondering what to do with the paint can. Brush-on paint is easier to store and can last up to 10 or more years if properly sealed. Avoid throwing spray paint cans in the garbage unless they are completely empty.

If the spray can still has some paint, lay down several layers of newspaper outside and spray the paint can until no more paint comes out and there is no hissing sound. After that, you may throw the can away. Throwing away partially used spray cans is both a safety and environmental hazard.

In order to carefully seal any leftover brush-on paint, you may need to clean out the grooves at the top of the can with a rag. Place the lid on the can and lightly tap it with a mallet to seal. Keep the leftover cans in a cool (not cold) space with limited exposure to sunlight. (Don't store them on a damp floor since the cans might rust.)

There are several ways to dispose of water or latex-based brush-on paint. If only a small amount is left, you can leave the can outside with the lid off and allow the paint in the can to dry completely. You can also use kitty litter to soak up the paint and dry it up in order to throw it away. A third option is to take it to a recycling center.

Fireplace Paint & Stove Paint
Man with a box of recyclable items

Shipping

Stove paint orders will ship via small parcel post. When your paint arrives, check the spray nozzle for any damages that might have happened during transport. Also, verify that the color code matches what you ordered. If you notice any issues, contact the manufacturer to request a replacement.

Summary

Whether you're looking to cover up a scratch, or planning to refurbish the entire fireplace, high-temperature paint is what you need. Check out the wide range of colors and finishes for a simple way to protect and enhance your appliance.

Fireplace Paint & Stove Paint
Freshly painted wood stove in flat black

Follow the basic guidelines for preparing the surface and applying the paint and you'll find yourself enjoying a fresh-looking stove or fireplace.

Do you have any questions about high-temperature paint or how to apply it? Feel free to ask one of our NFI Certified Specialists.

About the Author

Collin Champagne

With over 13 years in the industry, Collin is a National Fireplace Institute (NFI) certified technician and managed content for the eFireplacestore and eCanopy brands. He has achieved the highest NFI certification possible as a Master Hearth Professional and is certified in all three hearth appliance fields: wood, gas, and pellet. With experience with sales and in-field installations, his expertise shines through his technical knowledge and way with words.

Customer Q&A with Product Specialists

Ask a Question