Home Guides and Articles
A Complete How-To Guide for Venting Your Wood-Burning Fireplace or Stove

A Complete How-To Guide for Venting Your Wood-Burning Fireplace or Stove

When you look to install a wood-burning fireplace or stove into your home, you may think you have it covered. But, many times, people overlook one essential part - venting. Proper venting is vital for a working and efficient stove. But, as you start looking into venting, you'll find there is a variety available. So, where do you begin?

A Complete How-To Guide for Venting Your Wood-Burning Fireplace or Stove

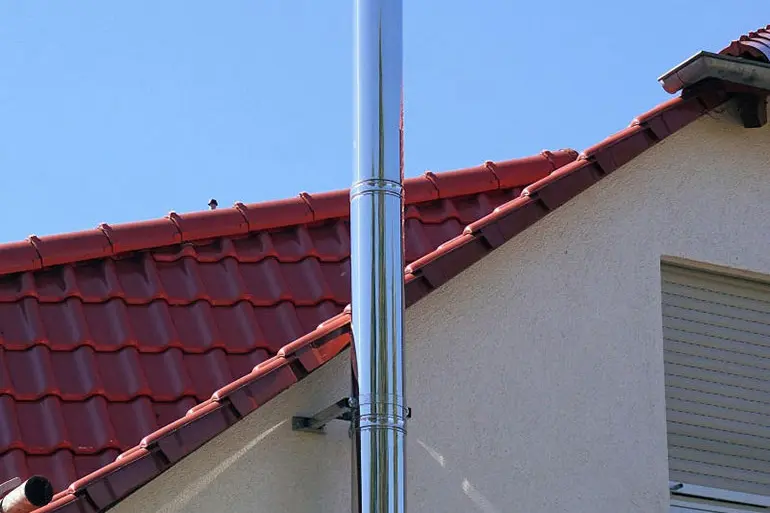
Most manufacturers rate their appliances to accept only a few venting systems. This makes for a less intimidating selection process. Yet, there are several things to consider to ensure peak performance of your unit. This guide covers various components needed to complete venting for a wood-burning appliance.

Venting Categories

The purpose of venting systems for wood-burning fireplaces and wood stoves seems similar. They actually differ a great deal. Wood burning appliance venting is broken into two primary categories.

Air-Cooled Chimney System

The first is known as an air-cooled chimney system. As the name implies, air-cooled systems use air for cooling. Space between the chimney walls allows for outside air to flow freely.

Many systems use two walls, but there are also three-walled systems. Since air does not insulate as well as a solid material, these chimney systems are usually large. Their design allows for at least two inches of air space between each wall layer.

Most air-cooled chimney systems have two chimney walls that are free-floating. This means they can expand independently and be assembled in individual sections. A majority of prefabricated decorative wood-burning fireplaces use such a system. And, almost all manufacturers have proprietary venting systems specific to these appliances.

Thus, these systems make it impossible to substitute other brands of venting. Doing otherwise would create unsafe venting and deviation from standing codes.

A Complete How-To Guide for Venting Your Wood-Burning Fireplace or Stove
Insulated Chimneys

The other type of venting is called a solid pack or fully insulated chimney system. This type of system features a layer of solid insulation between the inner and outer chimney walls. Typically, this insulation consists of a ceramic blanket, mineral wool, or fiberglass.

Three-wall chimney systems use a combination of air-cooled and insulating components. The solid insulation fits between the inner and center walls. The space between the center and outer walls circulate air for more cooling.

Insulated chimneys differ further from air-cooled systems in their structure. They are usually solid constructions that prevent inner and outer walls from separating. Here's how it works. Welded or riveted caps are affixed to the end of each chimney section or riveted braces between the pipe walls make physical separation impossible.

A Complete How-To Guide for Venting Your Wood-Burning Fireplace or Stove

Built-in, high-efficiency fireplaces and wood-burning stoves are capable of extremely high temperatures. So, they need insulated chimneys to maintain safe temperatures for surrounding combustible materials. Third-party companies manufacture many insulated chimney systems, rated for specific appliances. In some cases, many brands can fit a single appliance, which can cause some confusion on which is best. We cover the differences between brands and material grades in further detail below.

Similarities

Despite the differences between various chimney systems, they do have some common ground. Both systems use a stainless steel inner flue wall. This wall prevents deterioration from constant contact with corrosive flue gases. Additionally, they allow offsets to route the system around framing or other obstacles. They also allow the use of fire stops for passing the system through each combustible floor. Last, each system offers its own collection of support and termination components. Collectively, these parts work together to ensure a weather-tight seal above the roof.

A Complete How-To Guide for Venting Your Wood-Burning Fireplace or Stove


Design Stage

Before purchasing the appliance, you must determine how much venting you need. First, identify any special circumstances you may have. Next, figure out which venting your local code approves. Manufacturers provide a detailed list of potential venting scenarios in your owner's manual. The venting section of an owner's manual can be around a third of the text.

It is disappointing to find out your dream hearth isn't permitted in your area. But, there may be other suitable alternatives. By doing the research ahead of time, you can avoid a costly mistake and the hassle of return and restocking fees. This guide will help you solve the mystery behind venting measurements and clearances. If followed, it can ensure your installation proceeds smoothly.

When building a new home, we recommend working closely with the builder and an NFI certified technician. They can help you develop a comprehensive list of venting components you'll need.

Access to blueprints for your home is the best starting point for this type of planning. You can plan everything from venting height to offset dimensions with this information. Further, the technician can compile a list of components for your specific application.

Chimney Chase

If placed inside a proper enclosure within the envelope of the home, venting systems for wood-burning units can be routed through the ceiling. Another way to do this is to use a purpose-built chimney envelope or chase secured to the exterior of the home.

Chimney chases are popular choices. These structures contain the entire chimney system without sacrificing needed space. They also conceal venting pipe as it passes through upper levels of a multistory home. Although more costly, a chase is the most effective option if you want to conserve floor space.

So, if you wish to enclose your fireplace and chimney system, you can. The base of the chase must accommodate the framing dimensions of your fireplace. You can also taper the chase above the fireplace. Doing this leaves room to encircle the chimney pipe.

Smaller dimensions for a rough frame of a chimney chase are about two square feet. This is before adding external cladding or veneer. You can make the chase larger than required to suit the aesthetics of your home, although it is not required. Another option is having a set of recessed bookshelves or a TV enclosure built into the chase.

Manufacturers specify clearance requirements in inches. Clearances tell how much space is needed between combustible material and the appliance. This information is important to factor in when framing.

Chimney construction can be challenging for a novice. So, we recommend working with a seasoned installer. This will help you follow height and code regulations. We also recommend insulating the chase before enclosing. Doing so prevents large temperature differences and poor appliance performance.

A Complete How-To Guide for Venting Your Wood-Burning Fireplace or Stove
No Chase

In some cases, a fireplace or stove won't be built into a chase. Instead, it sits within a building envelope inside its own enclosure. Free-standing stoves may even sit upon a purpose-built hearth pad or a similar surface. In this case, you'll need to consider how the venting system will run from the appliance and through the home.

If it isn't possible to devote space to the vent run within the home, you can angle the vent towards the outside wall. This will allow it to feed into a cantilevered chimney designed to hold the vent pipe itself.

If the vent remains inside the home, you can conceal the system using a framed enclosure. You can finish it with drywall or some other material. Ideally, you'd want to route the vent pipe to the corner of a room or in a closet to avoid its visibility.

Venting Components

With the vent route and appliance selected, check your list of venting components. For most wood-burning fireplaces with a single venting system, the choice is simple. However, other brands offer many systems for their product. That's when things get a little tricky.

For appliances with multiple brand options, you may not know which ones to choose. The deciding factors include pricing, availability, material quality, and your specific installation. Pricing and material quality are closely related. Venting systems with lower quality stainless steel, like 430 grade, are cheaper. And, they don't last as long.

It often comes down to fuel type and personal preference on which are the best materials to use. For example, wood fuels are not as corrosive as the coal of fuel oils. As such, lower grade chimney systems can last for many years. Still, some customers choose to use a better system for peace of mind.

If you're unsure, feel free to consult one of our NFI certified technicians. They'll be happy to help you locate the best venting system for your price point.

A Complete How-To Guide for Venting Your Wood-Burning Fireplace or Stove
Evaluate Your Plan

For appliances that use air-cooled or solid insulated chimneys, evaluate your installation plan. Air-cooled systems do not perform well in cold climates. So, if you live in a cool climate and this is your only option, you should enclose as much of the vent pipe as possible. If permitted to use a solid pack chimney, that is your best option to ensure proper venting.

Once you have decided on the venting brand, notate the measurements of the venting system. The measuring process is straightforward for a vent system routed through a chimney. This type of venting doesn't usually have offsets.

Simply measure the distance from the top of the "as installed" appliance flue collar to the "as built" height of the chimney chase. After that, add any height needed above the chimney chase for a storm collar and chimney cap. This measurement is usually between 8-12 inches, though it can vary by brand.

In most cases, you'll need a combination of different length pipes for proper venting. While some manufacturers offer adjustable lengths, others do not. In those cases, you need to use a combination of components that meet or exceed the required height. Many manufacturers of chimney pipe list the pipes by the number of inches each section adds.

For example, a 48-inch pipe may add 46 inches of height to an existing pipe due to the overlap at each juncture. So, consider these measurements to avoid the pipe being too short during installation. If you increase the chimney height for code or design purposes, you can lengthen the vent run too. Just add another section of pipe.

Unfortunately, not all installations involve chimney chases and straight runs of pipe. You may need offsets to divert the venting. Or, the installation may need a length of the chimney to extend through a pitched roof. Manufacturers provide an offset chart. It specifies how many elbow sets or pipe sections you can add between them.

Most manufacturers offer fifteen or thirty-degree elbow sets. The latter is the maximum allowable offset by code in the United States. Manufacturers also specify how many offsets each vent run can have. This includes how much offset the total pipe length can be.

3-2-10 Rule

With offsets tallied and the roof-penetration point determined, you can calculate how much chimney pipe you need. To guarantee you have enough pipe, you must follow the 3-2-10 rule.

The 3-2-10 rule ensures code compliance and proper venting. A chimney that's too short can result in poor appliance performance. It may cause soot staining or damage to the adjacent structure of your home. Below we'll explain what each number means.

  • 10 — This number sets a radius to determine whether there is enough pipe present above the roof. The number represents 10 feet of space. In other words, you draw a 10-foot lateral circle around the pipe. Objects within this radius must meet clearance requirements. The steeper the roof, the more pipe you'll need. If any part of the home within this 10-foot circle is taller than the chimney, you must also consider that. 
  • 2 — Once you've established the 10-foot radius, add two more feet of the pipe before terminating. This helps to ensure the chimney avoids drafting issues caused by the house stack effect. The house stack effect refers to a ventilated part of the home being taller than the chimney.
  • 3 — This rule applies to all situations. It means any pipe penetrating a roof must be three feet above the roof line on the up-slope side of the penetration.

If there is a steep roof or nearby obstruction, the chimney will need more length above the roof to meet code. You can leave solid-pack chimneys exposed and braced. But, for air-cooled chimneys, you should enclose any length of pipe five feet above the roof. Greater pipe exposure can lead to poor performance from excessive chimney cooling, especially in colder climates.

A Complete How-To Guide for Venting Your Wood-Burning Fireplace or Stove

Installing a Fireplace

Once you've planned your installation and ordered venting components, you're ready to install. Please keep in mind that this is a general guide. Special circumstances may call for more components or bracing.

Roof Flashing Installation

Fireplacesinstalled inside the home with roof flashing must be properly aligned. Before anchoring an appliance, verify the alignment of the vent collar and venting path. Altering the vent run during construction often results in an offset between the two.

You might need an offset between the fireplace and the ceiling. If this is the case, we recommend installing the offset as high in the run as possible. This allows flue gases to gain more velocity before having to negotiate the offset.

To start, attach the first flue section to the vent collar on the fireplace. For air-cooled chimneys, attach the inner section first then the outer section. This type of chimney features a hem and lance system that audibly snaps when secured in position.

In contrast, solid-pack chimneys typically feature an anchor plate. It accepts and secures the first section of pipe. Twist-lock systems rotate into position, locking when fully installed.

As you assemble each pipe section, secure the outer wall using three #10, 3/4 self-tapping stainless steel sheet metal screws. The screws should be equidistant around the pipe perimeter. Continue assembly, maintaining the clearances to combustibles. We recommend bracing vertical venting every 5 to 6 feet. You can do this by using the perforated strapping or wall brackets. These are provided by the manufacturer.

A Complete How-To Guide for Venting Your Wood-Burning Fireplace or Stove
Firestops and Shields

Based on manufacturer instructions, install a firestop or radiation shield. These parts are positioned where the pipe run meets the ceiling. Manufacturers often suggest you nail a piece of 1/2 to 3/4 inch OSB across the opening. You'll also need a hole cut to the size of the firestop. Then, nail or screw the fire stop into position.

Continue the assembly and bracing sequence as you pass through the attic or second floor. In the attic space, you must use an attic insulation shield. This shield is especially important for homes with blown insulation. You can get an attic insulation shield from the chimney system manufacturer. Or, you may box the chimney into an enclosure. If you choose the latter method, ensure the chimney pipe maintains proper clearances.

When passing through the roof, you need to use a flashing that matches the roof pitch. Nail the flashing in place right after you put down the tar paper or weather membrane. This should be done before installing the roofing material as well.

For shingles, the trailing edge of the flashing base should sit on top. So, make sure the upper and adjacent courses of the shingles overlap under the edge of the flashing base. If you have a metal or tile roof, the installation depends on the manufacturer.

Most manufacturers recommend you cover the entire base of the flashing and cut a hole large enough for the flashing cone to project out. You can then seal the roof to the base of the cone with roofing sealant.

Once you have installed the flashing, continue assembling the chimney pipe. The pipe should be routed through the flashing and meet the 10-3-2 height requirements. Once you install the pipes, you must install a storm collar around the top of the flashing cone.

Storm Collar and Chimney Cap

A storm collar is a narrow strip of steel or aluminum that bands around the pipe. It diverts water from the outside of the pipe to the flashing cone. You can use bendable tabs or fasteners to lock it into place.

But, before installing the collar, apply a bead of flashing sealant to the pipe's outer wall. This is where the storm collar sits. Assemble the storm collar around the pipe just above the bead of sealant. Then, slide it down into the sealant. Check the sealant to ensure it has adequately filled the gaps between the collar and the pipe. You may need to add more as necessary.

Last, install the chimney cap. For solid insulated chimneys, the cap usually twists into position. Air-insulated chimneys omit lances from the cap so they can be removed and cleaned easily. Instead, brackets are provided to screw into the chimney system. With the cap in place, the system is done and ready for testing.

Interior Pipe with Chimney Chase

For this installation, the assembly process is the same as the attic. Once in the attic, the builder will frame a chimney chase. It should run from the roof decking to the ceiling joists for support.

They'll likely use an insulation shield for the pipe passing into the base of the chase. Or, they may enclose the chase after running the pipe. The pipe should be run the same as the rest of the previous sections all the way through the chase.

A Complete How-To Guide for Venting Your Wood-Burning Fireplace or Stove

Depending on the size of the chase, it may not fit each new section of pipe with the other assembled pipe. If that occurs, measure the remaining length of pipe from the top of the chase to the end of the last installed pipe.

Assemble that length on the roof then install from the top of the chase down. Secure each pipe section with fasteners before feeding the length into the chase. Once this is complete, repeat the process to assemble to the storm collar and cap.

Chase Pans

The top of almost every chimney is enclosed with a chase pan or chase flashing. These are usually an 18 to 22-gauge piece of galvanized steel cut to size for the outer dimensions of the chase. An adequate fabricated chase pan should have a 90-degree drip edge. It should be at least 2 inches deep and fit over the edge of the chase.

Ideally, larger pans will have cross bracing immediately to the side of the pipe to support the pan. Or, they will have formed an in-bracing run diagonally across the pan. The pan's hole should be approximately a 1/2 inch larger than the chimney pipe's outer wall. It should have a formed or welded collar standing at least 3/4 of an inch tall. This collar prevents water from rolling back into the chase along the chimney pipe.

You can get chase pans from local sheet metal fabricators and roofing suppliers. Due to the variety of sizes of chase pans needed, many manufacturers do not supply them.

Full Exterior Chimney Chase

This type of installation is more straightforward than an interior installation. You still need to complete the chase framing. But, you should leave off the exterior sheathing for easy access during installation.

You should install at least one firestop halfway up the chase. You can construct the chase from OSB, plywood, or whatever material your local code allows. Install the chimney manufacturer's metal firestop in the center of the material. The local code may require more firestops based on the total footage, so account for that in your plans.

With the fireplace in place, assemble the chimney sections and fasten them together as you do. Continue the assembly until the last section protrudes from the top of the chase. At that point, halt the installation while you complete the chase exterior. Once accomplished, install the chase pan and place the storm collar and cap in place.

How To Install Wood Stove Pipe Through Wall

A Complete How-To Guide for Venting Your Wood-Burning Fireplace or Stove

Installing a wood burning stove means you will need stovepipe. Stovepipe differs from chimney systems. Stove pipes, or chimney connectors, can be either single or double walled. Installation depends on the route used for the vent pipes: vertical, horizontal, or a combination of both.

Single-wall stovepipe is usually 24 or 22 gauge. Black galvanized steel pipes are double-walled. The inner pipe consists of 430-grade steel or 304 stainless steel. The outer wall is constructed from 22 or 24-gauge black-painted galvanized steel.

The stovepipe bridges the gap between the stove and first wall or ceiling of the vent run. It's aesthetically designed while allowing some heat reclamation from the venting run. The stove's installation determines the configuration of the vent run.

Vertical Vent Run

For stoves with a complete vertical run, the venting requirements are the same as a fireplace. Use house blueprints to determine how much of a run you need to install for any modifications to the structure.

For installations in an existing home, survey the ceiling joist and roof rafter locations. Ideally, the vent run should be positioned to avoid these framing members. But sometimes, you may need to cut and box in a ceiling joist or roof rafter to accommodate the vent pipe. Only qualified and knowledgeable individuals should undertake that part of the project.

With the stove location decided, now you must determine if you'll need a single or double-wall pipe. Single-wall pipe does not last as long as the stainless interior of a double wall pipe, but they do cost less.

Another thing to consider is the amount of clearance space needed. Single-wall stovepipe requires 18 inches whereas double walled only need 6 inches. With a corner or alcove installation, space is limited. So, clearances may call for a double-wall pipe.

Telescopic Pipes and Connectors

Most stovepipes offer telescoping sections. These telescopic pipes cover odd distances between the stove and ceiling. Single-wall systems also offer slip connectors. These are short pieces of pipe. They are smooth on one end to allow them to slide into a section of pipe before it connects to the chimney system.

Before purchasing a stovepipe, measure the distance between the vent collar on the stove and the ceiling. From that, determine how much pipe you need to cover the gap. Consider the length added from the chimney support box or ceiling support as well.

As stated, built-in fireplaces and wood stoves rely on solid-insulated chimneys. This is due to higher flue gas temperatures. The vent pipe itself doesn't change between high-efficiency fireplaces and stoves. But, the associated components do.

Ceiling Support Boxes and Collars

Stoves use ceiling support boxes or support collars for venting. You'll need these parts to transition from the stove pipe in the room to the chimney pipe above the ceiling. As the names imply, these parts bear the vertical weight of the chimney components.

Ceiling support collars are intended for installation in a flat ceiling. So, they are usually shorter than ceiling support boxes. Ceiling support boxes come in varying lengths and project downward into the room. It's possible to use a support box on a flat ceiling. But, they're used mainly to offer an extension through a vaulted ceiling. The steeper a vaulted ceiling is, the longer the support box needs to be to maintain clearances.

A Complete How-To Guide for Venting Your Wood-Burning Fireplace or Stove

Use a plumb bob to determine the center location of the ceiling support box or support above the stove vent collar. Then, cut an appropriately sized hole in the ceiling to accommodate the fixture. Almost all ceiling support boxes and ceiling collars factor in chimney pipe clearances. So, once the hole is cut, use 2x4s or similar lumber to brace around all sides of the fixture. This allows you to screw the ceiling support in place.

With ceiling support in place and plumb, now assemble the stovepipe. Almost all modern stovepipe systems use smooth ends. The sections fit over each other with self-tapping sheet metal screws. These hold the sections together.

Stove Pipe Adapters

The size of vent collars varies by brand. Because of this, manufacturers offer stove pipe adapters to start the run of pipes. This section is usually 3 to 4 inches in height with a tapered end that fits into the stove collar. The other end is smooth and mates with the first section of stove pipe.

A Complete How-To Guide for Venting Your Wood-Burning Fireplace or Stove

We recommend using as many rigid sections as possible when installing stovepipe. Avoid using too many telescoping sections since they do not seal as well and are easy to scratch.

Start by installing the first rigid section. Continue assembly until there's only a gap between the stovepipe and support box.

From there, collapse the telescoping section a little. You'll need to slide it down enough to fit between the last section of pipe and ceiling support. Next, connect this pipe to the stovepipe section below. Make sure to screw the bottom sections together. Telescope the upper section into position against the ceiling support box. You can use screws to keep the telescoping components extended and in position. But note, many manufacturers do not allow for fastening the stovepipe to the support box.

To complete the stovepipe run, the chimney installation is almost the same as a fireplace. The only difference is the first piece of chimney section dropping down into the support box. This piece may stem from either the attic or from the second floor. You'll twist this piece into position. After feeding the chimney pipe through the support box, install an attic insulation shield or radiation shield around it. The rest of the installation is the same.

Horizontal-to-Vertical Vent Run
A Complete How-To Guide for Venting Your Wood-Burning Fireplace or Stove

In some cases, vertical venting is not an option due to the home's structure. In those cases, it is possible to vent horizontally to an outside wall. From there, you can then return to a vertical chimney secured to the outside of the home.

Horizontal installations are much like vertical installations. You transition from stove pipe to chimney pipe when passing through the wall. But, instead of a ceiling support box, you'll use a wall thimble.

Wall Thimbles

Wall thimbles are two-piece adjustable adapters. They have a collar that adapts between the two pipe types. Adapters accommodate different wall thicknesses.

With horizontal venting, you must follow specific guidelines to ensure proper venting. You must start with a vertical run of stovepipe before making a 90-degree turn towards the wall. Most manufacturers suggest at least 12 inches of vertical run from the stove. This allows flue gases to gain upward momentum before encountering restrictions.

The horizontal section must have a 1/4 inch rise per foot of run. The slight upward slope ensures the flue gases will not stagnate in the vent run. Manufacturers also specify a horizontal-to-vertical run ratio.

A horizontal run of no longer than 50% of the total vertical run is typical. Each manufacturer specifies its own allowable run percentages.

Instead of ceiling support boxes, horizontal installations use wall thimbles. So, make sure to locate the ideal position before installing. You may need to cut and box a wall stud to allow the space for mounting the thimble. But, the manufacturer instructions cover this further.

Consider the vertical height of the stovepipe from the top of the stove. Don't forget to account for the height added by the 90-degree elbow. These calculations will help determine the position of the horizontal sections. Then, you can measure up from the floor and mark the center point of the thimble. From there, cut out the space needed to install the thimble.

Installation of the stove pipe is the same as for vertical installation. Start with the rigid sections and work from the stove to the wall. Install the slip connector or telescoping section last. Last, fasten each section of stovepipe with self-tapping screws. Then, connect it to the wall thimble.

The chimney installation differs for external installation. A short section of the horizontal chimney must attach to the outer side of the wall thimble. The length of it depends on wall thickness. The horizontal run should extend far enough to allow proper clearance of the vertical section as it travels against the side of your home.

Chimney Tees

Once the horizontal section is in place, use a chimney tee to make the transition back to a vertical chimney run. The tee consists of three elements. The first is a horizontal leg to accept a piece of the horizontal chimney. The second is a vertical leg from which the vertical chimney is run. The last is a plugged bottom leg to prevent leakage.

A Complete How-To Guide for Venting Your Wood-Burning Fireplace or Stove

The plug is easy to remove for sweeping of the vertical section of the chimney. Use a tee support bracket for the tee. It can either be provided by the manufacturer or fabricated by the homeowner. With the tee attached and resting on the bracket, assemble the chimney. We recommend placing vertical supports in place every 5 feet. Do this using wall straps or similar metal retaining bands.

Eaves and Soffits

Many homes have eaves or enclosed soffits that extend beyond the outer wall. Depending on the depth of the eave, there are several methods for dealing with this.

Shallow eaves of no more than 2 or 3 inches can use offsets. This allows the chimney to make a slight jog around the eaves without altering the structure of the home. Homes with deeper eaves, between 6 and 10 inches, have a few other options.

The first is notching the eave, leaving an open cut out for the chimney pipe to pass. You can finish it out with fascia boards and a rain diverter to prevent water from pouring into the notch.

A second option is building the chimney into the eave, using metal flashing to enclose it. Of course, you'll still need to maintain clearances to the wooden structure. This method is ideal due to support supplied to the chimney.

Homes with deep eaves of 10 to 36 inches require the chimney to pass through the structure. These are finished with flashing on the roof. This allows the chimney to be appropriately supported. And, this prevents the need to cut an excessively large notch. You may add a metal flashing around the chimney as it passes through the eave's underside.

For all applications, you must adhere to the 10-3-2 rule once the chimney is above the roof line. This will help determine how tall your chimney must be. Topping out the chimney with a cap is the same as with other installations. But, you won't need a storm collar if there is no roof flashing.

Above-Roof Supports

Any pipe installation above a roof that is unsupported by a chimney chase needs proper support above the roof line. No more than five feet of unsupported pipe is permitted.

High winds bend and damage unsupported pipes. Many manufacturers offer rigid dual leg brackets to anchor pipes to the roof. You can also use cables to tie the pipe back to anchor points.

Test Your Venting

With the installation complete, now you must test for draw and leakage. Build a small, kindling-based fire in the appliance and light it. As it burns, make sure to inspect as many accessible areas of the venting as possible.

Look for smoke leaks and condensation drips. Address any leaks by repositioning the stovepipe or chimney pipe properly. You may need to add more fasteners.

If the chimney does not draw well, check the horizontal run. It should not exceed the allowed ratio. Also, make sure the pipe meets the height requirements and adhere to the 10-3-2 rule.

A chimney that falls too short can see competition from the home. This is known as the house stack effect. If the vent system is too short, add pipe sections to correct this.

A Complete How-To Guide for Venting Your Wood-Burning Fireplace or Stove


You're Now Properly Vented

Trying to find the right venting for your wood-burning appliance can seem like a hassle at first. But, with this guide and a little time and patience, you can be confident that you have a properly vented and efficient wood-burning appliance.

Still have questions about venting, chases, or other fireplace concerns? No worries. Our NFI-certified technicians are thrilled to help!

About the Author

Dani Bell

Dani, our Head Writer and Editor, has been in the hearth and fireplace industry for six years. She has written a number of our articles for both eFireplaceStore and eCanopy to balance technical knowledge with customer-friendly terminology and style. Currently, she is studying to earn all of her National Fireplace Institute (NFI) certifications and works with the content department to add products to the eFireplaceStore and eCanopy websites.

Related Articles

Customer Q&A with Product Specialists

Jerry from Calais maie asked:
How much is required to cut through a roof clearance around an air-cooled chimney?
Specific clearances vary slightly from model to model, but we would recommend at least two inches clearance all the way around the outside pipe.
Answered by: Tyler M. - NFI Master Hearth Professional

Helpful?

0
Bart S. from Alliance,ohio 44601 asked:
How do you determine the correct size of vent pipe off woodburner?
That information can be found in the installation manual for the wood stove that you have.
Answered by: Aaron D.

Helpful?

0
Chris from Flint Texas asked:
Is it permissible for my self tap screws to penetrate the inner wall of my stainless steel piping?
If you are referring to the stainless steel chimney pipe then, no, you can't penetrate the inner wall.
Answered by: Kathy O.

Helpful?

0
Mike from Fairfiled County CT asked:
I have an oil furnace venting into my chimney. Can I tap into the exhaust pipe with my 6" SS flex pipe to vent my woodstove?
No, not by code. Two units cannot share a common chimney flue.
Answered by: Owen O.

Helpful?

0
Showing 4 of 6 Questions and Answers
Ask a Question