Home Guides and Articles
Wood Stove Installation: The Ultimate DIY Companion

Wood Stove Installation: The Ultimate DIY Companion

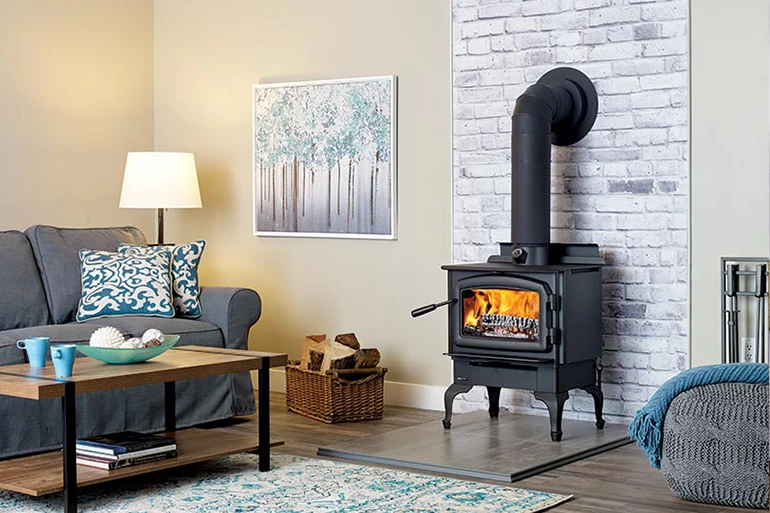
Anyone who loves rustic decor probably loves wood stoves. Wood stoves bring a classic elegance to every room they occupy. While they are usually simple in design, for the average person, they can appear complicated to install. So, we created this article to guide you in the process of wood stove installation. We will discuss wood stove clearances, stovepipe, heating capacity and more.

Wood Stove Installation: The Ultimate DIY Companion

It's important to note that wood stoves have a heating efficiency rating between 70% - 80%. What that means is they lose 30% or less of their heat up the stovepipe as they burn. Considering most wood burning fireplaces have an efficiency rating of 15% - 30%, you can get much more bang for your buck when you buy a wood stove.

Selecting the right size wood stove to heat your room

Before you can install a wood stove, you have to determine which one is the right size for your home.

How do you do that you might ask?

First, you have to figure out the square footage of your room. For all my non-mathematically inclined people out there, don't worry, it's a simple multiplication problem.

Step 1: Measure the length of your room

Step 2: Measure the width of your room

Step 3: Pull out a calculator and multiply the length by the width. (Or, if you're super smart, multiply it by hand on a real sheet of paper. Go ahead. I dare you.)

Step 4: If the total for the space you are wanting to heat (which can include multiple rooms) is under 1,500 square feet, you can go with a small wood stove. If you are in the 1,500 to 2,200 square foot range, you will need a medium size wood stove. Anything above 2,200 square feet is going to require a large wood stove to fully heat the space.

Wood Stove Installation: The Ultimate DIY Companion
wood stove with fan

As a side note, a wood stove blower is a great tool to assist with heating your space more quickly. These little machines can heat your room up to 35% faster than not using one at all. As the stove warms, the airflow created by the fan blades allows you to feel the heat sooner and create a more even distribution of heat. These are excellent tools for those extra chilly nights.

Even though the stove blowers will heat your space faster, they are not capable of heating a larger square footage than discussed above. Each woodstove has a capacity and there is not blower out there that will allow it to heat beyond what it was built to do.

Understanding the space (or clearances) you need to house a stove

One of the most important things you can do when deciding where to house your stove is to consider what objects will be around it. The material it is placed next to will determine the specific distance, or clearance, you need between the stove and your decor.

Generally, stoves should be installed at least 36 inches away from all combustible materials, including walls, furniture, and combustible floors. You can trim the 36-inch clearance down to as short as 12 inches if the appropriate heat shielding and stovepipes are installed. If you aren't sure if your stove can handle smaller clearances, stick to the 36-inch clearance rule to avoid any issues.

Wood Stove Installation: The Ultimate DIY Companion
stove clearances

Also, it's important that you never install a stove directly on a combustible floor. You can construct a hearth made from tile or brick or purchase a stove board if you find your floor isn't made of material that can withstand the heat.

If you plan to use the wood stove as your primary heat source, you should keep it in a central location so it can heat the entire space evenly. Adding vents above your doors, or a stove fan blower like we mentioned above, can help circulate the heat through multiple rooms and keep your whole family warm and cozy.

Wood Stove Installation: The Ultimate DIY Companion
stove in masonry fireplace

Some people choose to use the space in front of their masonry fireplace as a home for their wood stove. Brick and stone add a rustic, and heat resistant, backdrop while offering the possibility to use the current chimney setup. This is a great option to utilize the space you have and vent the stove using an existing masonry chimney or to use low-cost chimney liners to size the chimney down to meet the stove requirements.

For those of you who are cramped on space or not willing to move your favorite items around, a heat shield may be a great solution for your spacing problems. This paneled shield will protect combustible materials from the extreme temperatures of your stove. So you can enjoy your stove and keep your couch from exploding into giant flames.

Selecting the right vent pipe

Before you decide which vent piping is right for your wood stove, you need to understand a crucial difference between stove pipe and chimney pipe.

Stovepipe is used in the room the stove is located. It runs between the flue collar on your stove and the outside wall or ceiling it connects to. Once the pipe meets the ceiling or the wall, class A chimney pipe is required to safely contain the hot flue gasses as they pass through the combustible structure. You will hear stove pipe and chimney pipe used interchangeably sometimes, though they are very different things.

Wood Stove Installation: The Ultimate DIY Companion
stove pipe

When it comes to stove pipe, there are two main kinds: single wall stove pipe and double wall stove pipe. To decide whether single wall stove pipe or double-wall stove pipe is right for your wood stove, you need to figure out how close your stove will be to a combustible wall.

If you have at least 18 inches of space between the vent collar of your wood stove and the wall, then a single wall stove pipe will work. If you have less than 18 inches of space between the vent collar and the wall, and you don't plan on including wall protection, then you will need double wall stove pipe.

However, if you have a high-efficiency stove there is a caveat to the above outline. Because the modern wood stove creates lower flue temperatures, having a single wall stove pipe will cause more creosote buildup because high-efficiency stoves have much lower flue temperatures. You should use a double wall stove pipe if you have to run the piping over a long distance.

Once your wood stove installation is complete, you need to run a few tests to make sure everything is set up correctly. Start a small fire in the stove. Check for smoke or condensation leaks around the venting. Leaks are easily fixed by adjusting the position of your pipes. If your stove isn't drawing well, you need to make sure the installer didn't exceed the maximum horizontal run of pipe that it was installed using the 10-3-2 spacing standards.

Structural framing


Wall venting

In a situation where you can't vent your pipe through the second floor to the ceiling of your home, a passage will have to be cut through the outside wall. If you have a brick or stone wall, you're going to need a contractor that has tools and experience installing steel lintels to support the weight of the brick or stone above.

For wood-framed walls, you have to find the wall stud using a stud finder first. If the stud blocks the path that would be needed to maintain proper clearances, the stud will also need to be cut back to allow the correct space for the vent to pass through.

Ceiling venting

For vertically vented stoves, proper clearances are still required between the pipes and framing of your house. Sometimes, ceiling joists and roof rafters and inhibit the pipe from venting straight up. Redirecting the vent pipe with a set of elbows is a good solution to address this issue.

If it turns out that a ceiling joist is directly in the path of the vent pipe, the ceiling joist will need to be cut and boxed to adjacent joists. Because cutting a ceiling joist will take away support for that section of the ceiling, the joist must be supported first with temporary wood bracing back from where the cuts will be made. This bracing must remain in place until the blocking has been installed.

Wood Stove Installation: The Ultimate DIY Companion
ceiling support

Then, a ceiling support will be used to transition the stove pipe to chimney pipe. Wall thimbles are similar structures used for the same purpose in wall vented applications. Both of them require a specific set of framed dimensions to hold the pieces in place.

When cutting a roof rafter, the roof decking must be cut to allow enough clearance for the vent pipe to pass through and terminate.

When cutting and boxing both ceiling and roof rafters, it is highly recommended to install joist hangers. These are specially made brackets that join the cut ends of the boxing to the adjacent framing. The facilitate the installation of fasteners and help to distribute the load.

While this article could never tell you every detail of what you need to know about wood stove installation, I hope you walk away feeling like you have a good handle on the level of skill needed to complete this job and if you are ready to take on the challenge. If you have any questions, please reach out to our NFI certified techs and they are available Monday - Friday 8:30a - 5:30p CT.

About the Author

Collin Champagne

With over 13 years in the industry, Collin is a National Fireplace Institute (NFI) certified technician and managed content for the eFireplacestore and eCanopy brands. He has achieved the highest NFI certification possible as a Master Hearth Professional and is certified in all three hearth appliance fields: wood, gas, and pellet. With experience with sales and in-field installations, his expertise shines through his technical knowledge and way with words.

Related Articles

Customer Q&A with Product Specialists

Ask a Question