DIY Fireplace Maintenance Guide
Seasons change. Fireplace use goes up and down, but you should still perform a maintenance check of your fireplace regularly. As it gets warmer and spring blossoms, you'll find that this is the best time to conduct gas fireplace maintenance.
This is especially true if you use your fireplace more than a few times per season or if it is vital to your home's warmth. Experts suggest that it would be best to do the bulk of your yearly maintenance when the cold seasons end, but while it's still fresh in your memory. This way you can avoid the risk of having your fireplace out of commission before the next cold season is upon you.
But, you should always be sure to inspect your fireplace at the beginning of the season, too.
Considering that gas and electric fireplaces are quickly becoming the most common fireplaces homeowners encounter, most consumers don't consider the regular maintenance and cleaning that these hearth appliances need.
In this article, eFireplaceStore will provide some excellent maintenance tips and strategies to help you keep your fireplace in pristine condition year-round. We'll take you through each type of appliance, a workable maintenance schedule, and even shed light on some unanticipated maintenance hurdles you may encounter with each venting method.
To start, we'll cover all the ins and outs of gas fireplaces.
Cleaning Your Gas Fireplace
Gas fireplaces are becoming exceedingly popular options for homeowners today. This is due to their relative ease of operation and cleaner burn than solid fuel models. However, this doesn't mean that your gas fireplace requires no maintenance.
What You Can Expect
Because of their lower combustion temperatures, gas models often harbor spiders in the gas valve area and in the corners of the combustion chamber. They also build up more dust that is prone to clogging injection orifices, venturis, and intake vents. Look to perform a thorough inspection of all accessible areas at the beginning of the season and clean the system as needed.
Positioning Gas Logs for Optimal Performance
If a log placement diagram is not available, take several photos of the log set from different angles. Then, remove it to allow access to all corners of the firebox. With the logs removed, activate the burner assembly and observe the flame pattern of both the pilot light and the main burner flame.
The pilot flame should fully engulf the flame rod or thermocouple. The main burner flames should have strong yellow tips with a blue/white base. Any observed build-up of carbon on the thermocouple should be lightly sanded away with 320 grit sandpaper or an emory cloth. Now is also the best time to inspect the air intake ports and burner orifice for debris. A compressed air canister and soft-bristled noodle brush work great for removing debris. Once complete, replace the logs and light the appliance to verify proper operation. You'll want to verify that flames are not hitting the logs directly, but rather, curve around the logs.
Direct-Vent Models
Direct-vent models use a double-wall vent system. This vent will never need cleaning. However, you should be familiar with where the vent termination is on the home. You may have either a horizontal and vertical vent termination. But, you'll want to have it inspected at the beginning of the burn season for any blockages or debris. It's easy for low mounted terminations to become choked with lawn debris or vertical terminations to become the ideal spot for birds to nest. Either scenario can cause intake air blockage and improper operation as a result.
The glass front used to seal direct vent fireplaces can build up a film over time, a combination of condensation and soot. You can remove the glass and clean it as needed. A water-based cleaner and soft rag work best. Glass removal procedures differ for each model, so review your owner's manual to prevent damage. When removing the glass, pay close attention to the condition of the perimeter gasket. Usually a woven rope, this material can break down or separate from the glass over time, causing air leaks. Replacement universal gaskets are readily available.
Lastly, direct-vent models rely on outside air for combustion. This air usually enters through open ports in the floor of the appliance. Vibration in the unit can cause ember material, lava rock, or glass media to cover these ports, starving the unit of combustion air. Consult the owner's manual to help with proper placement of ember material, logs, and lava rock. Proper configuration is essential to a clean-burning and efficient fireplace.
B-Vent Models
B-vent models will always have their vent termination above the roof. You will need to identify it and ensure that it is free of debris or unwelcomed blockages such as bird nests before the burn season. It's not uncommon for other critters or pests to find a peaceful resting place in your chimney vent, so you want to be certain to check for this before firing up your appliance.
Although each manufacturer will provide concrete maintenance instructions and guidelines to keep your appliance running as it should, you can never be too safe. So below, we have devised a helpful inspection schedule to keep you and your loved ones safe and your home secure.
Inspection Schedule: Gas Fireplaces
Before Every Fire
- Visually check for any logs out of place.
- Check for loose glass fronts (on direct vents).
- Check for visible dust or debris.
Before Each Burn Season
- Visually inspect the chimney termination.
- Remove logs and clean/inspect the combustion chamber area.
- Verify proper startup and good flame pattern.
Each Year
- Inspect the outer condition of chimney vent enclosures and flashings.
- Remove the vent cap and check for blockages within the vent.
So, what if you have an electric fireplace? You're likely wondering if and how maintenance requirements differ for these units. Well, while electric fireplaces aren't quite as complicated as their gas-burning counterparts, there are still some maintenance tips you'll want to follow.
Cleaning Your Electric Fireplace
Electric fireplaces are an excellent choice for those living in warmer climates or rented homes. They don't require venting, and most don't require costly renovation to install one. Yet still, these appliances have maintenance needs just like all fuel-burning hearth appliances.
As with gas models, electric models tend to harbor spiders and collect dust near the circulation fan that draws in room air. You'll want to check the appliance regularly for dust build-up. You may even have to remove access panels to clean the appliance.
You'll also want to add lubricating oil to any serviceable blowers and replace any burned out bulbs in non-LED models. Any odd smells usually indicate when it is time for a cleaning. And, as with all important electric appliances, check the condition of power cords for chew marks, especially if you have small animals or unwanted pests.
Inspection Schedule: Electric Fireplaces
During Each Start-Up
- Pay close attention to any odd smells.
- Listen for any odd sounds such as rattling or whistling noises.
- Observe for any unusual operation.
Before Each Burn Season
- Check power cords for damage.
- Increase power cord inspection to every two months for year-round use.
- Remove access panels and wipe down all areas subject to dust build-up.
Each Year
- Replace burned-out bulbs.
- Thoroughly vacuum out the dust from blower fans and crevices.
- Follow the recommendations of the manufacturer.
Now that you have a pretty good grasp on the maintenance needs of gas and electric fireplace appliances, what about traditional units that burn solid fuels? We're talking about those traditional wood-burning masonry or prefabricated fireplaces, free-standing wood stoves, and those pellet-burning units.
Solid fuel hearth appliances have their own unique maintenance needs, so we want to cover those here as well.
Cleaning Your Wood-Burning Masonry Fireplace
An open, wood burning masonry fireplace is what most people think of when they think fireplace. What most don't think of is the maintenance involved in keeping an open masonry fireplace clean, safe, and functional. So, we'll cover each component of these units piece by piece to ensure you have a clear understanding of how to maintain them properly. Let's start with the chimney.
Chimney
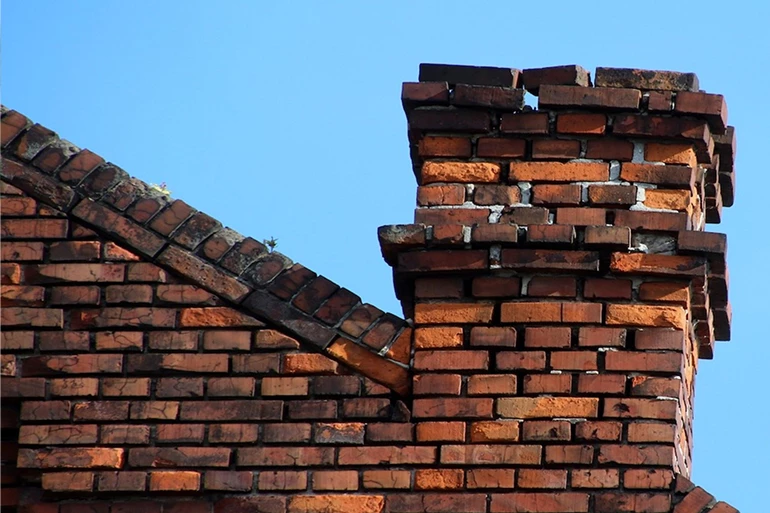
You should inspect your chimney structure at least once per year. If ice or snow are common in your area, you should examine your chimney more often. Look for cracks in the exterior brick or stone masonry.
It's also a good idea to inspect for rotting wood around the transition between your home and chimney or for deterioration in the chimney wash. This is the concrete slope around the flue at the top of the chimney.
Any areas where water can enter and then freeze will cause damage sooner rather than later. If you have any of these issues, have someone address them immediately. Postponing repairs could increase costs astronomically.
Don't forget that you will need to clean your chimney according to how often you use it. Heating fires are the second most common cause of residential fires after cooking fires. In fact, 52% of those heating fires start in a chimney due to the buildup of creosote.
You can easily avoid this with regular cleaning of your chimney. Along with regular cleanings, you can get the job done yourself with a few extra items.
Tools You'll Need
You'll need a wire brush, a set of screw-together fiberglass rods, some plastic sheeting, and a canvas fireplace opening cover. However, if you are uncomfortable with performing these duties yourself, it's always a wise idea to hire a professional chimney sweep.
Best Strategies for Removing Creosote in the Chimney
Advantages of the Top-Down Method
If attempting chimney cleaning on your own, there are some best-kept secrets you should know. We recommend using the top-down method of chimney cleaning over the bottom-up approach. The former helps contain the falling ash in the interior of the fireplace. You can use plastic sheeting or canvas fireplace opening covers to do this.
In a pinch, you could also use a large trash bag or two. If using more than one layer, place the first layer against the top of the fireplace opening. You'll want to face any overlap towards the floor to make it harder for the ash to escape.
Also, if you choose to clean your chimney using the top-down method, you'll be able to inspect the chimney cap as well as most of the interior of the chimney. Doing this will help minimize creosote buildup, maintaining it to a Stage 1 level, which is less than 1/8" of buildup. The top-down method allows you to spot problems with your chimney sooner than those opting for an annual chimney inspection.
Stage 2 and 3 creosote buildup is much heavier and thicker and will require more specialized tools to remove. Standard brushes will not work well. So, you'll need rotary chimney tools, such as chain heads and wire heads to remove such buildup. These tools are designed for use with a heavy-duty electric drill and steel rods.
While the top-down method and assembly of the rods call for similar processes, denser creosote buildup takes longer to remove. So, with rods, you'll experience much more fatigue. In these cases, it is often a better option to defer to a chimney sweep to complete this kind of work. They should already have the specialized tools needed to complete the task. Cleaning a clay tile or unlined chimney can be a complex process. But, regular cleaning of your chimney makes it simple.
The goal is to be proactive instead of reactive. Staying on top of your chimney maintenance needs simplifies everything else.
Reasons to use the Bottom-Up Method
Not all chimneys are accessible by the average homeowner. Height limitations, a steep roofline, a lack of equipment to access the chimney, or a fear of heights can all present problems. In these cases, tools do exist to clean the chimney from the bottom up.
Products such as the VIPER cleaning systems use a flexible reel-type rod and collapsible wire brushes. These items fit through a standard-sized damper opening, allowing you to clean the chimney from the bottom up.
The process is more straightforward in the sense that you'll apply an up and down sweeping motion with a continuous rod, so there is less setup. The downside to this type of system is that it does not allow for an inspection of the chimney tiles, an examination of the cap, or containment of the falling ash. As such, a top-down flue inspection still needs to be completed each year.
If you're going to clean your chimney yourself, please note this fact. Each brush manufacturer specifies brush sizing for the best results. Many will recommend a brush that is sized specifically to the flue you are cleaning, but wire brushes can typically be up to an inch oversized without causing issues cleaning.
How To Execute The Top-down Cleaning Method
1. With the opening covered and the damper open all the way, use a ladder or scaffold to access the top of the chimney.
2. Inspect the chimney cap before removing it for access to the flue. Look for excessive corrosion, bird nests, broken or missing screen material, and loose mounting screws.
3. With the cap removed and set aside, push the brush head into the end of the clay flue or brick opening, and then, screw the first fiberglass rod into position.
4. Slowly push the brush down until you can screw the next rod into place. Continue the process until the brush reaches the smoke chamber above the damper.
5. Draw the entire assembly out until the brush has reached the top of the chimney.
Note: Repeat the up/down passes as needed until a visual inspection reveals only light buildup remaining. Stage 1 creosote usually brushes out well enough so that the chimney tiles and mortar joints are clearly visible.
6. Use a high-powered flashlight to complete the inspection after cleaning. Take your time and inspect each flue tile top to bottom. If you see any cracks or broken tiles, do not use the fireplace until you get it repaired.
There are also bottom-up style brushes. These brushes are usually formed in a collapsible lattice. As such, most manufacturers recommend these brushes to be 2 inches larger than the diameter of the chimney. This size difference requires less effort. Be sure to always refer to manufacturer recommendations on brush sizes!
What Should You Inspect?
Firebox
Every time you build a fire, you should inspect the firebox, as this is one of the most essential parts of your hearth. Without a functional firebox, you increase the risk of a house fire every time you light a fire in your hearth.
First, empty the firebox of all ashes left behind from previous uses. Once the firebox is empty of ash, examine the firebricks. Look for cracks that are the size of a dime. Pick several points on the back wall to gently press on with the brush end to see if the fire bricks are loose.
Never operate a fireplace with broken, missing, or badly cracked bricks. Flue gases can escape into the surrounding brick structure and transmit heat to adjacent framing. This could cause a fire.
Fireplace Aids
You'll also want to verify that any installed fireplace aids work the way they should. If your fireplace has an ash door and ash chute, verify that both the internal and external ash doors operate and aren't too corroded. Additionally, if the fireplace has an outside air tube or supply, verify the door or slider works as it should, without any blockages.
A wise investment, if you use your fireplace often, is an ash vacuum. An ash vacuum makes cleaning the firebox and removing ashes from the chute easier.
Damper
Inspect the damper for its condition and proper operation. If your fireplace uses a traditional cast iron damper, verify that the poker control or rotary control opens the damper. Using a flashlight, examine both the damper plate and damper throat. If you see heavy corrosion, the damper will need to be replaced soon. You'll also need repairs if the damper plate or throat is perforated or loose.
Because the proper operation of a top mount damper is difficult to assess by one person, we recommend two people inspect it. Inside, one person should operate the chain or lever that allows the damper to open. Meanwhile, the other person should be outside to observe the operation of the damper, ensuring it opens fully. You may observe this from the ground with shorter chimneys. But, you may need a higher vantage point to assess tall chimneys. This should be done every year to ensure the springs, levers, and seals are in good condition.
Cleaning Your Prefabricated Wood-Burning Fireplace
Prefabricated wood-burning fireplaces are becoming more common than the traditional masonry fireplace. This is, in part, due to the EPA restrictions on burning solid fuel.
Prefabricated boxes are similar to masonry examples. Both units call for cleaning products in the same category. However, the components themselves will differ a little. Prefabricated boxes lack ash chutes. But, you should still conduct internal inspections and keep them clean.
Rather than true firebrick, most prefabricated models will have cast refractory cement liners. You should inspect these for cracks or deterioration and replace them if larger cracks or holes are present. Ideally, the steel chassis behind the liners should be inspected annually for severe corrosion. To do this, remove the brackets holding the liner in place. This will allow you to tilt out the liner and set it aside.
Prefabricated boxes also have integral dampers. These should be inspected for proper operation and corrosion. Some prefab boxes also have outside air controls. These should be examined as well. Any box with holes in the steel chassis should be serviced immediately. Holes allow hot gases to escape through the air space between the inner and outer chassis. Because most models allow combustible framing to touch the external chassis, holes could result in a fire.
Different Cleaning Approach
Chimney cleaning procedures are pretty much a mirror of masonry chimneys, though there are a few differences. Metal chimney brushes and creosote removal tools should not be used on prefabricated chimney sections. Steel on steel interaction leads to premature wear. As such, only polypropylene cleaning brushes should be used on prefabricated chimneys.
As with masonry models, inspect chimney caps and the overall condition of the chimney pipe while you are cleaning. You can use a flashlight to inspect for an excessive creosote buildup. Additionally, you need to observe the chimney pipe for any evidence of warping, cracking, or separation of chimney sections.
Prefabricated chimney flues may be routed inside a chimney chase. This structure serves as a "false" chimney that is usually framed with wood and clad with brick veneer, siding, or other finishing material. This false chimney is designed to hide the otherwise unattractive metal venting system used by these systems.
This type of construction is prone to deterioration and should be inspected annually for rot, settling, and cracks in the exterior. If you have access to the interior of the chimney chase, inspect it for evidence of water intrusion or leaks.
Inspection Schedule: Wood Burning Fireplaces
Before Every Burn
- Check damper for operation.
- Inspect interior firebrick for cracks.
- Examine the condition of the flue.
- Check the ash chute and/or outside air duct operation.
Each Year
- Inspect the outer condition of the chimney for cracks in the brick.
- Clean the chimney and inspect the chimney cap.
(Annually for the occasional user; bi-annually for the average user, and as needed for regular users.)
Cleaning Your Wood Burning Stove or Stove Insert
These are also called closed combustion solid-fuel appliances. They are often more efficient at producing heat than their open counterparts. This makes for a slower, more intense burn. A hotter fire coupled with air recirculation devices allows these units to burn less wood. And, they release less particulate pollution in the atmosphere. The design of these appliances also cuts down on the amount of chimney maintenance. However, air recirculation systems do need periodic maintenance and inspection.
Cleaning the chimneys of wood stoves call for methods like those used to clean the prefabricated fireplace chimneys. Built-in fireplaces and stoves will use a metal chimney system, while fireplace inserts will use a rigid or flexible liner system. Since they are made from various grades of steel, it is essential to stick to poly brushes to prevent wear.
Closed-combustion appliances usually have fire bricks for insulation. You'll want to inspect them before each burn and replace them as needed. Outside air systems should also be checked for proper operation.
Complete a visual inspection of the baffles or catalyst. Any large cracks or crumbling of the material indicates a need for replacement.
Closed-combustion appliances also use sealed doors, usually with a glass panel. Check to ensure the glass fasteners are tight and the door gasket seals properly. Soot buildup in one area on the glass is usually an indicator of an air leak. Door gaskets are available from both manufacturers and aftermarket suppliers. A high-temperature adhesive is used to hold them in place. Be sure to use the correct size gasket for a proper seal.
Most closed-combustion systems also use room air blowers. These should be inspected, and any spider webs or built-up dust should be vacuumed away. If the blower has oil points, add a few drops of machine oil to each service port.
Non-Catalytic Wood Stoves
One main difference with non-catalytic appliances is that they usually use ceramic or steel baffles in the ceiling of the firebox. The purpose of the baffles is to divert flue gases away from a direct exit to the chimney. This allows the appliance to burn all but the lightest air particulates before they can escape around the baffles to the chimney vent.
When cleaning the chimney, these baffles must be removed to allow all swept debris to fall down into the combustion chamber for removal. Designs differ, but most baffles rest atop a set of air injection tubes.
The air injection tubes are held in place by bolts or quick release pins. With the tubes removed, the baffles can be set aside. As the baffles are being removed, the air injection tubes should be inspected. Sagging, corrosion, or perforations in the tubes, other than the factory drilled holes, are all conditions that warrant replacement. Because each appliance is different, read the owner's manual for specific requirements.
Catalytic Wood Stoves
Catalytic appliances are like the non-catalytic variety. But, instead of a set of baffles, they use a catalyst matrix. The catalyst filters flue gases and allows the appliance to burn at a lower temperature than non-catalytic appliances. As with the non-catalytic models, the catalyst must be removed to allow a straight opening to the chimney vent.
Some catalysts slide into position through an access slot. Others are held in place with brackets. Again, refer to the owner's manual of your appliance for more information.
Freestanding Wood Stoves
These appliances may contain ash drawers. You will need to verify these operate as designed and empty them regularly. The ash dump on most stoves is a spring operated door, while some models use a drop-in plug. Before each fire, verify that the door slides as designed and that there is no ash preventing it from closing. For drop-in or threaded plugs, verify they remove. Make sure to clean any debris that prevents them from sealing.
Chimney vent systems on free-standing stoves can be more complicated. Many of these appliances feature a combination of horizontal and vertical vent routing. Any installed clean-out tee joints or telescoping connectors should be used to gain access to all parts of the chimney when cleaning.
The process of cleaning the vent is the same as masonry models. But, the various offsets involved in some installations means more time is required for a thorough cleaning. You will need to use a brush to push debris to the open end of any horizontal runs for removal.
Inspection Schedule: Wood Burning Stoves or Inserts
Before Every Burn
- Inspect the interior firebrick for damage.
- Check the condition of the flue.
- Examine the catalyst or baffles for cracks or other signs of damage.
- Monitor door gaskets and glass for excessive soot and ash buildup.
Each Year
- Inspect the overall outer condition of the chimney for cracks.
- Replace damaged baffles or catalysts as needed.
- Clean the chimney and inspect the chimney cap.
(Annually for the occasional user; bi-annually for the average user, and as needed for heavy users.)
Cleaning Your Pellet Fireplace, Stove, or Insert
Pellet stoves and fireplaces either use wood pellets or alternative fuels like corn, cherry pits, grass pellets, or bean byproducts. Because this fuel is dry and lightweight, it emits a good deal of very lightweight and sticky, fly-away ash. So, it must be cleaned frequently.
A full inspection of the combustion chamber should be completed before its operation. Any residual buildup of spent fuel and fly ash on heat exchanger tubes should be vacuumed away. Check the condition of the burn pot and look for any cracking or warping.
Venting systems also build up fly ash and should be inspected at least twice a season. You can use purpose-made cleaning rods with an attached 3 or 4-inch pellet vent brush to sweep away this lightweight ash.
Cleaning procedures are the same as wood appliances. But, light ash removal requires less effort. Flexible brush and rod combos are available to navigate the turns in pellet venting systems. If the system uses a dedicated outside air vent, ensure it is not clogged with fly ash or attached to the appliance incorrectly.
When operating the appliance for the first time of the season, take note of any odd sounds. Unusual noises may indicate issues with the blowers or the feed auger. Ensure all feed doors are closing as designed and that the glass to the combustion chamber is clean.
The hopper, which feeds pellets to the appliance through the feed auger, is unlikely to be a source of a clog. This doesn't mean the hopper is entirely problem-free. It will not hurt to inspect the hopper from time to time to make sure no foreign matter that could clog your system has slipped in.
Inspection Schedule: Pellet Appliances
Before Every Burn
- Visually inspect for any defects in the burn pot or refractory brick (if equipped).
- Check door gaskets and glass for cracks and secure connections.
- Clean heat exchanger tubes and remove ash.
These steps should be done before the first burn of the season and at least once per week during the season. Constant use will require more frequent cleanings as well, although each appliance varies.
Each Year and As Needed
- Inspect the overall outer condition of the vent pipes and termination for cracks.
- Remove excess fly-ash from essential components.
- Clean out the vent system at various access points.
- Check for air blockages on outside air systems.
Again, these steps need to be done at the start of the burn season and again after a week of normal operation. From then on, it should be cleaned as needed. Burn rates, fuel quality, and vent run all make differences in the frequency of maintenance and upkeep.
Summary
Now that you have a solid footing on the proper ways to maintain your hearth appliance you can feel confident in your abilities to maintain it like a true professional. While eFireplaceStore always recommends our customers to follow and abide by the unique instructions provided in their owner's manual, the information presented in this guide will keep you on track for long-lasting durability. If you find yourself with additional questions, please feel free to reach out to our team of NFI Certified Technicians. They will be happy to assist you.